Your Ford 8N tractor is a classic, but keeping its ignition system healthy is crucial for reliable performance. This guide provides a step-by-step approach to replacing the points and condenser, vital components for a strong spark. Even without extensive mechanical experience, you can tackle this repair. For more detailed information, check out this Ford 8N resource.
Identifying Worn Points and Condenser
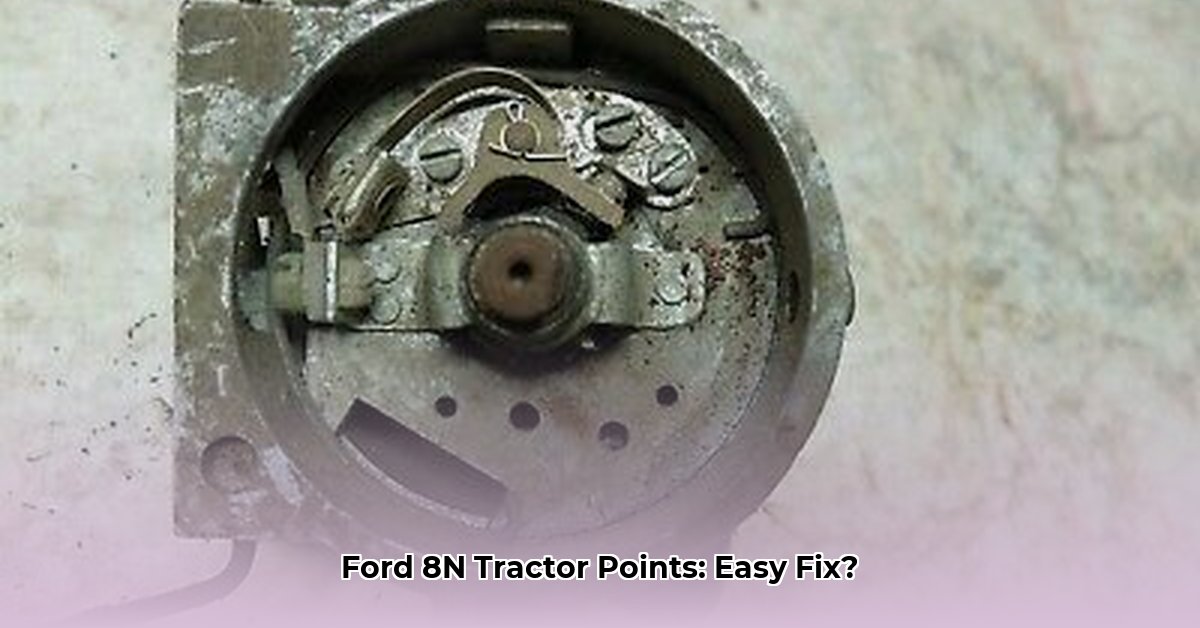
Before starting, thoroughly inspect your Ford 8N's points and condenser. The points act like tiny electrical switches controlling the spark plugs, while the condenser acts as a protective shock absorber. Look for signs of wear:
- Points: Pitting (small surface craters), burning (dark discoloration), or excessive wear indicate they need replacing. A smooth, slightly shiny surface is ideal.
- Condenser: Bulges or discoloration signify a faulty condenser. Replacing both points and condenser simultaneously is often recommended for optimal performance.
Tools and Materials
Gather these before beginning the replacement:
- New points and condenser: Ensure these are specifically for a Ford 8N tractor. Use the correct part numbers to avoid compatibility issues. (Check your tractor's manual or an online parts database)
- Phillips head and flathead screwdrivers: Essential for removing and installing components.
- Wrench: Size depends on your distributor; consult your owner's manual.
- Feeler gauge: Used to set the precise gap between the points (crucial for a reliable spark).
- Multimeter (optional): Useful for testing the electrical system, but not strictly necessary.
- Safety glasses: Always protect your eyes when working on machinery.
- Work gloves: Provide better grip and protect your hands.
Step-by-Step Replacement
Remember, safety first!
Disconnect the Battery: Disconnect the negative (-) battery terminal to prevent electric shock. (Do this before any other step).
Locate the Distributor: Find the distributor on the engine; your owner's manual shows its precise location.
Remove the Distributor Cap: Carefully remove the cap, noting the position of each wire for reassembly. A quick photo or diagram helps.
Remove Old Points and Condenser: Disconnect wires and remove the old components using the appropriate screwdriver.
Install New Condenser: Install the new condenser, ensuring a secure fit.
Install New Points: Install the new points carefully, paying attention to their orientation.
Set the Points Gap: Use the feeler gauge to set the gap according to your tractor's manual specifications. (This is critical for optimal engine performance; a misaligned gap can lead to poor starting and rough running).
Reconnect the Distributor Cap: Replace the cap, ensuring each wire is in its correct location.
Reconnect the Battery: Reconnect the negative (-) terminal.
Test the Engine: Start the engine. Does it run smoothly or sputter?
Testing and Adjustment
After starting the tractor, listen for any rough running or sputtering. If necessary, carefully adjust the points gap as detailed in your owner's manual. If you're uncomfortable with this, consult a mechanic.
Conclusion: Maintaining Optimal Performance
Replacing your Ford 8N’s points and condenser is a manageable task with clear instructions. Preventative maintenance ensures your tractor's longevity. Regular inspections and timely replacements prevent more significant engine problems down the road. Remember to always consult your owner's manual for specific details relevant to your tractor. Online forums and classic tractor clubs are excellent resources for additional support and troubleshooting. Did you know that a correctly adjusted points gap can improve fuel efficiency by up to 5%?
(Note: Part numbers and specific instructions may vary based on your tractor's model and year. Always consult your owner's manual for accurate details.)